
August, 2017 | BCS Cleaning Specialists
How Do I Clean Remove Pee Urine From A Mattress?
August 30, 2017
If you have kids, chances are at some point you’re going to have to do with a bed-wetting incident. Or 47. Follow our simple, 7-step guide to restoring your mattress to its pre-pee glory.
- Use a dry towel, cloth, or paper towels to blot up the excess urine, then strip the bed. Avoid rubbing the area, as this will only push and spread the urine deeper into the mattress.
- Sprinkle baking soda onto the area to absorb the remaining moisture.
- Make a solution of biological washing powder and water. You can also use a solution of one part white vinegar to one part warm water – don’t forget a clothes peg for your nose!
- Spray your chosen solution onto the stain and leave to sit for 3-5 minutes. If using a commercial stain remover, always carefully follow the instructions on the product packaging, be sure to wear protective gloves, and open the windows for ventilation.
- Repeat the first step, blotting up any moisture with a towel or dry cloth. This is to get rid of any remaining urine and prevent mold, so try to get the mattress as dry as possible.
- Sprinkle baking soda again over the entire mattress. The mattress needs to be given time to dry out thoroughly – at least 18 hours – so preferably leave it to dry overnight while the occupant sleeps elsewhere.
- Vacuum up the baking soda and prop the mattress up outside or in a well-ventilated area to allow air to circulate and shift the last of the odour.
If you’re still struggling after following these steps, or if the above just seems too time-consuming, give the experts at BCS Cleaning Utah a call at 801 561 1730 – we’ll have your mattress spit-spot (minus the spot. And the spit, come to think of it) in no time.
How Do I Clean and Remove Fleas From My Mattress?
August 17, 2017
Sigh. Fido is a darling, but really – fleas in BED?!? There’s nothing worse than finding biting little jumpy things in the serene sanctums of your bed. Plus, fleas breed at a rather alarming rate, so if you’ve become the victim of their attentions, there’s no time to lose.
Follow our simple, three-step system to quickly eradicate fleas from your cosy sleeping environs.
Step 1
Strip your mattress of all sheets and bedding and wash them in hot soapy water at a temperature of at least 95 degrees. Your washing machine’s hot water setting should be more than enough do the trick. A normal household dryer’s settings are usually hot enough to kill fleas too, so dry all your bedding using your dryer’s highest heat setting. Fleas can’t survive in a hot dryer longer than 20 to 30 minutes, so between your washer and dryer, you’ll exact a double-whammy of a killing spree on the ghastly little creatures. Make sure to check the care instructions for your bedding first, and just keep in mind high heat settings can damage some fabrics. Be sure to transport your bedding to and from the laundry room using dedicated bags in order to prevent cross-contamination to other areas of your home.
Step 2
Next, vacuum the whole mattress surface two or three times, on both sides and the edges. If you have a bagless vacuum, immediately dump the resulting detritus in an outdoor trashcan, and wash the vacuum outside with HOT soapy water. If your vacuum has a bag, remove the bag and dispose of it outside.
Step 3
To not give them even the tiniest hope of survival, we’re going to completely de-flea your mattress. Some people recommend boric acid for this, but why have toxins near where you sleep when you can use less toxic, natural products.
You’ll need:
- Food-grade Diatomaceous Earth (aka, “DE”) Safe and non-toxic for you and total hell for fleas. It will completely wipe out your flea population within a few days’ time. Yay!
- Vet’s Best Natural Flea and Tick Home Spray, or similar
- A Mattress Cover To seal the above de-flea mixture into the vicinity of your mattress until all the fleas have, ahem, fleed.
Spray your bare mattress with the Vet’s Best spray, and then wait a few hours until the mattress is dry.
When dry, slip on the mattress cover and before you seal it up, squirt DE inside. Seal up the mattress cover. The DE is harmless to you but lethal to fleas, so you want to trap all the fleas in their with their arch nemesis. Once fleas come into contact with the DE, it only takes a couple hours to kill the adults, but it’s worth leaving your mattress sealed for a good month to make sure you get any hatched flea eggs too.
If the above seems like a lot of hard work, or if you’ve tried it all without success, give the experts at BCS Cleaning Utah a call. We can move things along exponentially with a good deep steam-clean treatment on your mattress. Give us a call today at 801 561 1730 to schedule your FREE consultation.
How Do I Clean and Remove Bed Bugs From My Mattress?
August 17, 2017
There’s no two ways about it – bed bugs are nasty. They chomp relentlessly on humans and aren’t too picky about munching their way through your pets if you happen to not be available. It’s vitally important to start treating them as soon as you realize you have a problem – otherwise the problem will only get worse. Much worse.
If you’ve been unlucky enough to be saddled with bed bugs, have no fear – BCS is here! Follow our simple, four-step system to quickly eradicate the little buggers from your cosy sleeping environs.
Step 1
Strip your mattress of all sheets and bedding and launder them in hot soapy water at a temperature of at least 120 degrees. Your washing machine’s hot water setting should be more than enough do the trick. A normal household dryer’s settings are usually hot enough to kill bed bugs, so dry all your bedding using your dryer’s highest heat setting. Bed bugs can’t survive in a hot dryer longer than 20 to 30 minutes. Between your washer and dryer, you’ll exact a double-whammy of a killing spree on the ghastly little creatures. Make sure to check the care instructions for your bedding first, and just keep in mind high heat settings can damage some fabrics. Be sure to transport your bedding to and from the laundry room using dedicated bags in order to prevent cross-contamination to other areas of your home.
Step 2
Next, vacuum the whole mattress surface, bedframe, baseboards, headboard and under the bed using the upholstery attachment on your vacuum cleaner. Vacuum thoroughly…..and then vacuum again – the little devils are masters at hiding. Give special attention to seams and crevices, where dirt, dust, dead skin, and other icky nasties collect; you may want to switch to your vacuum’s crevice attachment to help you suck out the deeply entrenched nasties. If you have a bagless vacuum, immediately dump the resulting detritus in an outdoor trashcan, and wash the vacuum outside with HOT soapy water. If your vacuum has a bag, remove the bag and dispose of it outside.
Step 3
Wrap your mattress (and even your box spring) in specially designed, bed bug-proof encasements. These stop bed bugs from being able to hide and make nests in your mattress. Delightful.
Step 4
Spray and scrub all hard surfaces with a good brush or cloth and a pesticide designed for bed bugs. Follow all the product instructions to have the best chance of eliminating the bed bugs. This is no time to be half-hearted.
If the above seems like a lot of hard work, or if you’ve tried it all without success, give the experts at BCS Cleaning Utah a call. We’ve been cleaning everything that stands still long enough in homes for decades, and can add a good boiling steam clean treatment to your efforts to eradicate bed bugs. Give us a call today at 801 561 1730 to schedule your FREE consultation.
How Do I Clean My Mattress?
August 3, 2017
Most people spend about a third of their lives on their mattress. When was the last time you gave yours a proper, deep cleaning? Clean things make you feel good, and besides helping you enjoy a more pleasant and productive night’s sleep, a clean, cared-for mattress can actually last longer—and might even help prevent naughty, nasty pest infestations.
Cleaning your mattress twice a year is a good rule of thumb. It’s also worth checking the mattress label for instructions since the manufacturer might recommend rotating the mattress head to foot to ensure even wear.)
Step 1
Strip your mattress of all sheets and bedding and launder them.
Step 2
Next, vacuum the whole mattress surface using the upholstery attachment on your vacuum cleaner. Give special attention to seams and crevices, where dirt, dust, dead skin, and other icky nasties collect; you may want to switch to your vacuum’s crevice attachment to help you suck out the deeply entrenched nasties.
Step 3
After vacuuming, check for stains and spot treat them with an appropriate cleaner (check your mattress label or manufacturer’s website for their suggestions). An upholstery cleaner or enzyme-based pet-odor remover usually effectively removes most bodily fluids. A simple solution of 1 teaspoon mild dish detergent and 1 cup of warm water also works wonders.
Step 4
Next, deodorize the mattress by sprinkling baking soda over the entire surface. Especially if this is your first cleaning, don’t be afraid to empty an entire 1-pound box onto the mattress. Baking soda is truly a miracle product! You’ll get the best results if you leave the baking soda in place for 24 hours, so you might want to plan the project around an overnight trip, or spend a night in your guest room. The UV light from the sun is also a natural sanitizer, so if you can place the mattress near a window, so much the better.
Step 5
After the baking soda has done its thing, go back over the mattress with your vacuum’s upholstery attachment. If you don’t already own a mattress cover, we now would be the perfect time to invest in one. And adding a mattress pad between the cover and bottom sheet will help absorb moisture. The mattress pad and cover will give your mattress extra layers of protection to help prevent mites, fleas, and other pests from moving in.
If the above seems like a lot of hard work, give the experts at BCS Cleaning Utah a call. We’ve been cleaning everything that stands still long enough in homes for decades, and can easily take care of your mattress with your regular carpet cleaning. Give us a call today at 801 561 1730 to schedule your FREE consultation.
How Do I Clean My Blinds? Part 4 – Vacuum
August 1, 2017
Blinds are fiddly things. Fiddly to open, fiddly to close – and downright fiddly to clean, especially in dry Park City and the Salt Lake Valley, where dust is rife. But have no fear! With our 4-part series, we’ll give you a top tip each week to clean your blinds with minimal expletives.
Vacuum
Yes, I know this really doesn’t sound like rocket surgery, but a frankly alarming amount of people don’t even consider using the vacuum to clean their blinds. I know it does seem a tad heavy-handed, but the wand and brush attachment on your vacuum can take so much of the work out of blind-cleaning, especially if they’re dry.
Method:
- Hook up the brush attachment to your vacuum’s wand. Run it over the slats, left to right and working top to bottom.
- Bonus: zero drips.
And hey presto, clean blinds in a jiffy!
If you discover while you’re wrestling with the wand that your windows really could do with a jolly good once-over at the same time, give the professionals at BCS a call today at 801 561 1730. We’ll help you create the matching set of clean blinds and windows pronto.
Article Archives
Recent Posts
- How To Keep Newly-Installed Carpet Fresh & Clean
- Can I Walk On Carpet While It’s Wet?
- How Long Do Freshly-Washed Wet Carpets Take To Dry?
- 3 Simple Steps To Remove Scuffs From Walls
- How To Easily Remove Grease Oil From Stovetops
December 2021
November 2021
October 2021
September 2021
August 2021
July 2021
June 2021
May 2021
April 2021
March 2021
February 2021
January 2021

We want to hear about your experience!
Leave a review for BCS on Google Maps and show it to one of our technicians and we’ll give you $25 cash on the spot! Leave a review on our Google maps page.
Current Specials
Specials coming soon.
Greater Salt Lake City Area
Call! 801-561-1730
While we’re at your home, make use of our other cleaning services!
-
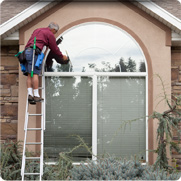
Window Cleaning
When it comes to window cleaning, we have no boundaries. Learn More
-
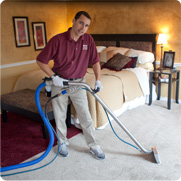
Carpet Cleaning
Have the best first impression possible for your home or business! Learn More
-
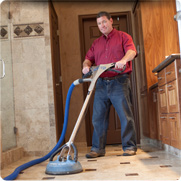
Tile Cleaning
See spills, scum, and dirt no more! Our tile and grout services will get all the dirt out of your tile and grout! Learn More
-

Rug Cleaning
Don’t do it yourself! Let us clean and protect your area rugs to help prevent future stains. Learn More
-
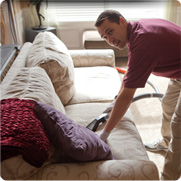
Upholstery Cleaning
Give your loveseat some love! Upholstery cleaning can make your furniture and fabrics look new! Learn More
